Data Jockey: Quick Start
-
Installation:
- In order to build and install Data Jockey please reference the file "README.BUILD" which is included the Data Jockey source code download.
-
Importation:
- Before actually using Data Jockey we must import some audio files into its database. We use the command line application datajockey_importer for this.
- example: datajockey_importer /path/to/audio_file.ogg
-
DJ:
Once we have imported some songs into the database we can use the
main Data Jockey application.
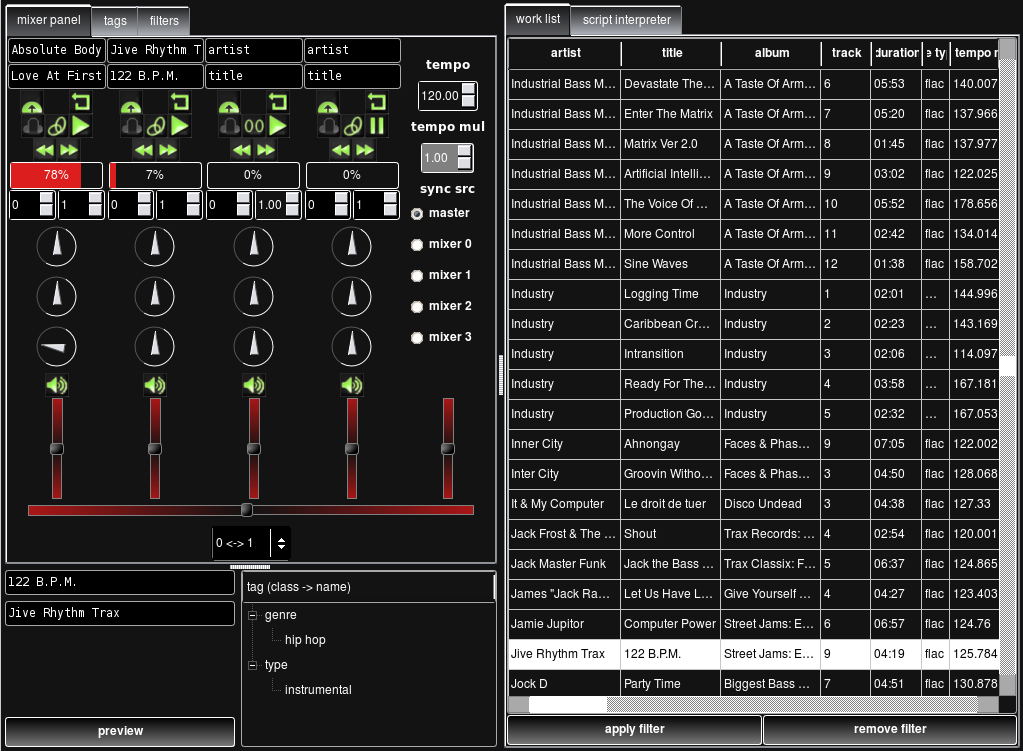
Click here to view a screen shot of the main application.
-
Launch the application: datajockeySometimes you may have to launch jack externally before launching Data Jockey.
- Make sure you have the main outputs "output0" and "output1" connected to the outputs of your physical audio output device. (you can use jack_connect or qjackctl to do this).
- Select a work in the audio work database view ("work list" on the right).
-
 Load the selected work into the first mixer by clicking the
'load' button (displayed here) above that mixer channel. (loading takes a few seconds)
Load the selected work into the first mixer by clicking the
'load' button (displayed here) above that mixer channel. (loading takes a few seconds)
-
 Click the cue button to make the audio go to the main outputs.
-
 The cue button should now look like this.
- Select and load another work into the second mixer as you did above.
- Once you have selected the main outs for this mixer, by toggling the cue button as above, you should hear 2 songs that are playing in synch with each other.
- You can adjust the relative volumes of these songs by adjusting the slider in the appropriate mixer channel.
- You can adjust the global tempo by clicking the arrows on the tempo 'spin box' at the top right of the mixer panel.
- Explore! Most of the items in the mixer have tool-tips associated with them, so if you hover the mouse pointer over an item it should give you a short description of what it is.
-
Launch the application: